Well, here we go again. The Simplicity Sewing Challenge.
I have found some lovely lace in my stash that I am overlaying onto some navy lining.
I got my fabric from the wonderful WRAP https://en-gb.facebook.com/yourWRAP
Check out the facebook page, if you are passionate about recycling then this is the place to come to.
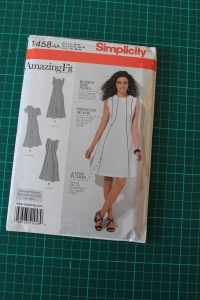
As this is an amazing fit pattern, I have learnt by experience that perhaps it is best to not to go too far off the original design, my aim is simple and stylish.
My changes are therefore going to be :-
- Lower neckline at front
- V neckline at back
- Rouleau button opening on back instead of a zip
- Longer sleeves with lace frill, using a different sleeve pattern
- Lengthen the hem and shorten the lining to take advantage of the lovely edging of the lace.
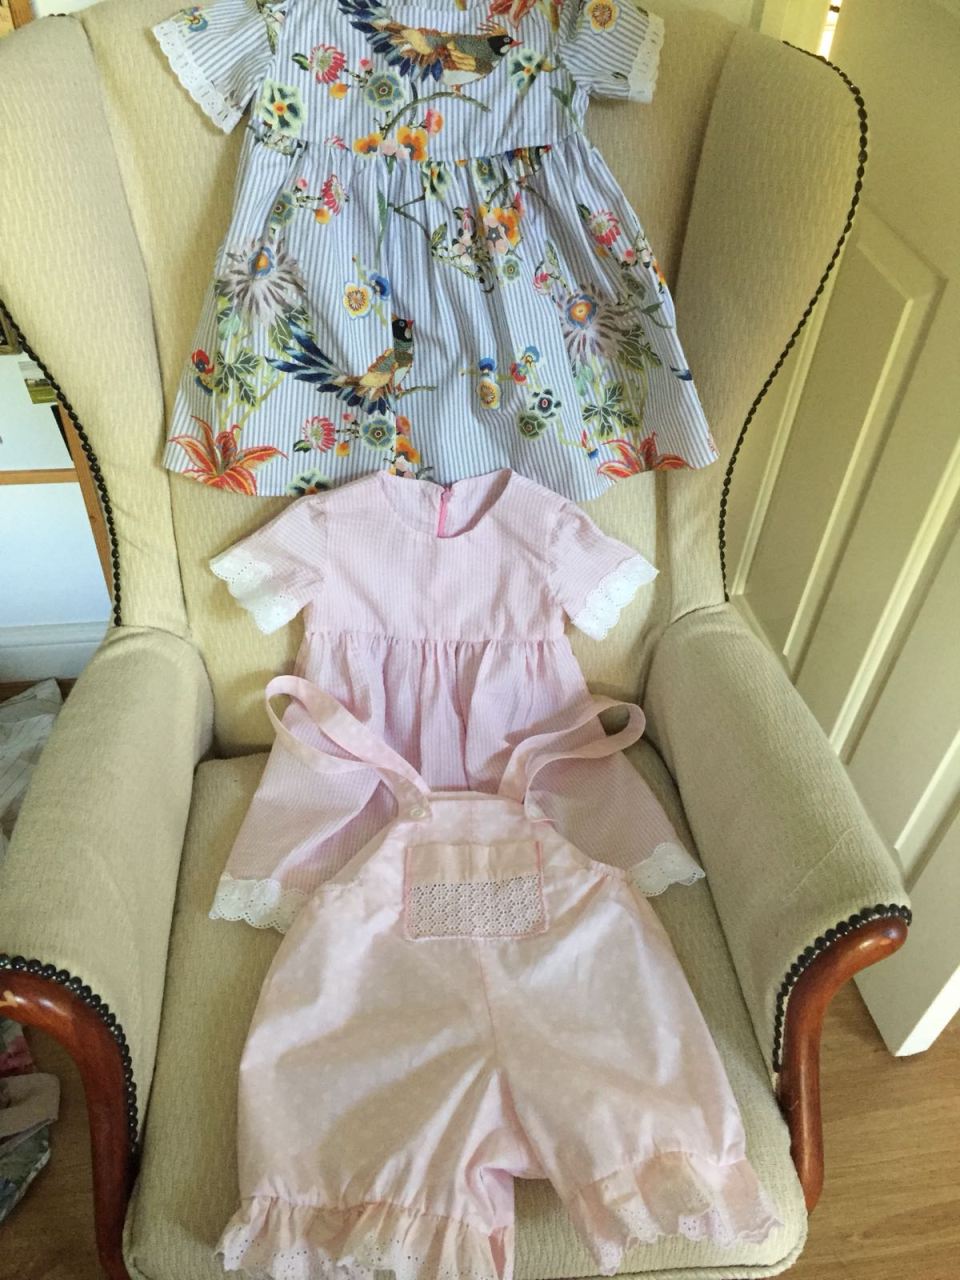
Main Dress
I cut the pattern out using the lace border on the fabric for my bottom hem. As I have cut out this dress before, I know that it came out quite big as there was a lot of ease so I actually cut out a size smaller and it fitted well.
I cut a new lower neckline and a v at the back, using the front and back necklines from other Simplicity patterns as a guide.
I cut the two layers of fabric out separately, then pinned the lining to the lace on each piece so that I could sew them in one go, instead of making a separate lining.
The lining was cut shorter than the dress so I hemmed the lining sections individually as I wanted to make the dress up in one piece, rather than a dress with a separate lining.
I like to stitch my seams and then overlock them afterwards, so I made the dress up following the pattern instructions, first joining all the front pieces and then the back pieces, side seams and shoulders. Fitting and pressing along the way.
I used bias binding for the neckline in a contrasting colour and stitched it onto the outside edge first as I wanted to hand finish it on the inside.
Sleeves
As I was using a remnant of fabric donated by local industry to WRAP. This was fantastic but of course but I was conscious of the amount of fabric required and what I actually had. I ended up quite short on lace and so was unable to make the sleeves the length that I wanted. However, I decided to make a short sleeve with a frill, taking advantage of a small bit of lace left with a scalloped edge.
Now, you never know how big a piece of fabric you are getting and the scraps I had left were just a bit short on me cutting out my frill, so I joined two pieces of lace together on one sleeve for the frill. From the pictures I don’t think it shows, you would never know. This was just a case of using a simple zigzag to join the two pieces together and trimming the lace close to the zig zag.

I attached the sleeves, that were pattern hacked from another simplicity pattern having previously checked the notches would fit by cutting out and pinning in a sleeve in scrap fabric first.
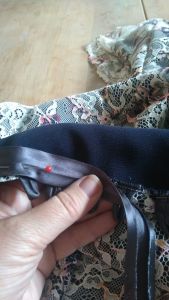
The Rouleau loops
Again I scoured the web for helpful hints and there are many wonderful people that post utube clips and websites with great pictures and instructions.
I used some of the same biased binding as the neck, cut the length of the opening plus a small allowance for turning over each end. Stitching a very narrow seam approx. 5mm, turning it out with a looper. I then cut this long strip into 2.5cm strips for the rouleau loops.
I marked out the placements for the buttons at one inch intervals with a pen and placed the loops on the markings, also tacking them into place. Then I placed the binding against the back opening and machined the biding into place. This worked and gave me a good result. I then used some bias binding to neaten the edge and the raw edges of the loops.
Now for the buttons. I had some really pretty buttons that I was desperate to use but they weren’t the right colour. Now a friend of mine often uses nail varnish to paint her earrings to match her outfit, so I raided my nail varnish bottles and found a pretty pink and a purple that matched perfectly with my dress. As you can see the result is quite cute. The light purple buttons and the bronze buttons didn’t need painting.

I pinned the loops in place at the back in order to make sure I sewed the buttons on in the right place.

I think they look really colourful
Tips and what I have learnt
This pattern requires time spent to get the fit right. Get a friend to help you fit it as it make the job much quicker.
Thanks to
Watford Recycling Arts Project – for my fabric
Simplicity patterns
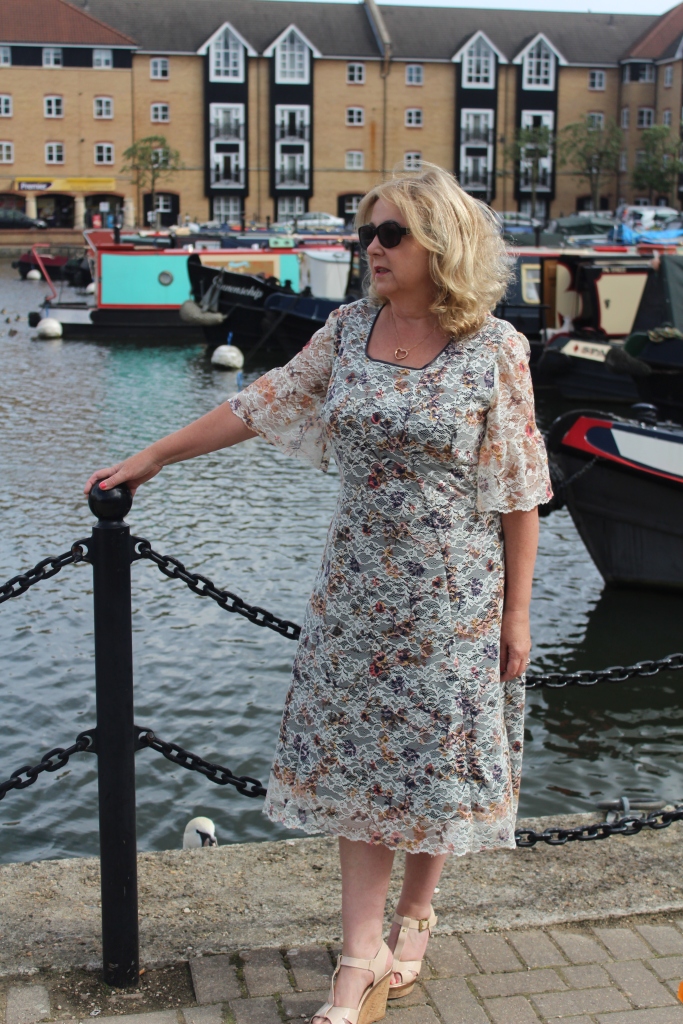
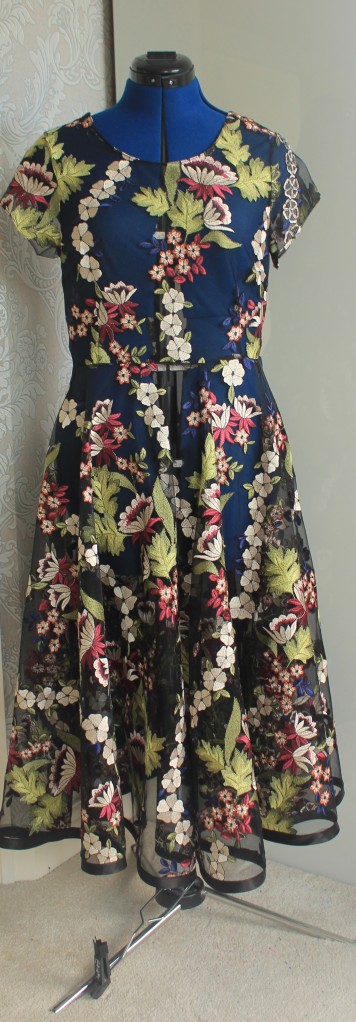
So here is my finished dress, not as ambitious as my first attempt but hey, this pattern is an “amazing fit” so why play around with it?


 My home is bedecked with cushions. I think they really brighten the place up and they are easy to make whether you do it from scraps or treat yourself to some lovely fabric.